Camera Basics 101

Thursday 28 August 2014

Your camera is actually nothing more than a box with a hole in it. Yes, all that money you’ve spent and that is basically what you’ve got. The basics of a camera have changed very little since day one. You have a box with a hole in it and you control how much light is allowed into it.
basic photography
“The Moment It Clicks” captured by Flávio
The best part about newer cameras is that they can think for you. They meter a scene and adjust the settings. These settings are simply the shutter and the aperture. You simply have to compose the shot and push a button. This works well for the most part. But, you didn’t spend all of that money to allow the camera to do all of the work for you, did you?
Cameras have manual settings, as well. These settings allow for creativity and for you to override the auto settings. I’m going to let you in on a little known secret: your camera, as smart as it is, doesn’t always get it right! Sometimes, you will need to override its settings. Other times, you will choose to override its settings.
This article will show you how to do just that, as well as provide you with some examples and/or circumstances as to when it may be necessary. This article covers the very basics of exposure control. There is far more to learn about this subject but this will help get you started.

ISO

ISO determines how sensitive your camera is to light. The higher the ISO, the more sensitive to light your camera will be. Remember, though, the higher the ISO, the more noise you will introduce into your image. Ideally, you should always shoot at ISO 100. This is the best setting. However, this is not always possible. Let us say that you are indoors, at an event, ISO 100 will probably not work very well. Meaning, it will not allow you to hand hold your camera at 1/160 or higher. We will cover more on that later.
So, what you have to do is start bumping up your ISO. Try 200, then 400, etc., until you achieve a shutter speed that you can hand hold. Most cameras today are much better with noise. Using an ISO of 800 or higher can still produce good quality, clean images. I recently did a shoot at The Kentucky Derby Festival Balloon Glow, where I was shooting at ISO 1600, and I was impressed with the results.
high ISO photography
“Balloon Glow” captured by Forsaken Fotos at ISO 1250
Just remember, your goal is ISO 100. You should stray from that only when necessary. Why would you ever need to stray from that? Well, let’s say that you are indoors at a sporting event, and at ISO 100 your shutter speed is at 1/120 of a second. That is not going to work. Your images will be blurry. So, you bump up your ISO until you can achieve a shutter speed that will stop the action. We will cover shutter speed in more detail later. But, in general, you bump up your film speed, which makes your camera more sensitive to light, allows for a higher shutter speed, and smaller apertures. But, the downside to higher film speed is noise.

Shutter Speed

Shutter speed is calculated in seconds. A shutter speed of 1/160 means 1/160 of a second. A value of 1 means one second, while a value of 2 means two seconds, and 1/1000 means 1/1000 of a second. Yes, this is very fast! Most cameras will go up to 1/4000 to 1/8000 of a second. Most of your photography will not need to utilize these speeds. In general, you will find that your average needs will be met using anywhere from 1/60 to 1/500 of a second.
Now, what exactly is shutter speed? Shutter speed is the amount of time that the shutter remains open. In other words, it controls how long the flap to the hole remains up. Longer time equals more light. A byproduct of this longer exposure is blurred images. Sometimes, this is a desirable effect. For example, when photographing a running stream and you want the water to look silky smooth.
slow shutter speed photography
“The Creek” captured by Mitch Johanson (Click image to see more from Johanson.)
However, this is not what you want when shooting sports or action shots. You want a faster shutter speed to stop that action. Generally, a good action stopping shutter speed is around 1/200 of a second and up. You will find that 1/500 of a second is not uncommon to stop action at a football game. For this type of image, the faster the shutter, the better. This is where ISO comes into play.
Remember, you can bump up your ISO to make your camera more sensitive to light. This will allow for faster shutter speeds. You can also change your aperture to increase shutter speed. More on that later.
Generally speaking, for hand held photography, you want the shutter speed to equal your lens focal length, that is, the minimum shutter speed (secs) = 1/focal length (mm). So, if you are using a 55-200mm lens and your zoom setting is at the 100mm mark, you want a shutter speed of 1/100 of a second. This works well, except when you get below a 60th of a second. A 60th of a second, in general, is the minimum hand held setting you want to use.
On a side note, many new lenses now come with vibration reduction, or image stabilization, which will allow you to easily hand hold at 1/40 of a second, and possibly even slower shutter speeds. This all depends on how steady you are. In general, try to keep your shutter speeds at 1/60 or faster.
Slower shutter speed equals more time that light is being allowed in. Using shutter speeds under 1/60 equals blurry images. To capture silky smooth looking water flows, you have to slow things down to around one second or slower. Obviously, you cannot hand hold a camera at that speed so you will need a tripod.
Faster shutter speed equals less time that light is being allowed in. Fast shutter speeds stop action.
fast shutter speed photography
“Up in the Air – FUN” captured by Ram Iyer (Click image to see more from Iyer.)
Remember, the rule of thumb: shutter speed should equal the lens focal length. Still, in my experience, I try to double that, if possible, for sports. For portrait shots, the rule of thumb works fine.

Aperture

Aperture controls the size of the hole or iris that allows light into your camera. It is the doorway to your sensor. Smaller apertures mean less light, while larger apertures means more light.
There is an inverse relationship with this. Small apertures, like 1.8, mean the aperture (the hole) is larger. Higher values, like 5.6, and 8.0, mean the hole is closing up, getting smaller. So, a larger aperture number means less light is getting in. Remember, this determines the flow of light coming in, while shutter determines how long it is allowed in, or how long the flap is left open. Once open, the aperture is the size of the hole the light is passing through.
Other than the amount of light being let in, the aperture will also determine how in focus the objects around your main subject will be. This is called depth of field. A large aperture, such as f/1.8 or f/4.0, will tend to blur objects in front of and behind your main subject.
large aperture photography
“Untitled” captured by Giusy Siesti (Click image to see more from Siesti.)
Let’s say that you are taking a portrait and you want to blur the background. You would choose a larger aperture, the largest your lens will allow. This could be 1.8 or 5.6—whichever it is, this is an ideal setting for a single portrait shot. This works very well with zoom lenses. With a zoom set at a 5.6 or lower setting, you can generally turn your background into a soft blur, this is called bokeh.
bokeh
“After the Rain” captured by WhiteSpiritWolf (Click image to see more from this photographer.)
*Note that the further away the background is from your subject, the greater the blur will be.
Here is a simple test that will show you just how different apertures work in the real world:
Take your camera, along with several batteries. Stand the batteries up and place them on a table about 16 inches apart. Have at least 3 for this test. Now, take your camera and put it into AV mode, then set your ISO around 1600. You may even need to go higher since you are indoors. Remember, you want a shutter speed around 1/60 of a second, so if you have to bump up your ISO more, that’s fine. You will notice, as you move your aperture, your shutter speed will automatically adjust for you. Your goal here is to be able to hand hold your camera for this test. Bumping your ISO up will help you achieve a faster shutter by making your camera more sensitive to the light.
Now, focus on the middle battery and take pictures with different apertures. Start with the largest, that would be 1.8, 5.6 etc. and work your way up to F16. Notice what happens to the other batteries with the smaller apertures of f/8, 11 and 16. They begin to come into focus. At f/5.6, and below, they are somewhat blurred.
Portrait photography is all about making the subject stand out, and one way to do this is to blur the background by using a large aperture of f/5.6 or greater. Remember, larger equals smaller numbers. If you are shooting a large number of people, then you will not be able to do this, because you will need a smaller aperture, of around f/8 or so to bring the crowd into focus. Remember, you can only focus on one person but you will have many at different distances from the camera. A smaller aperture, i.e., a larger number, can compensate for this difference.
Small aperture = larger numbers: f/5.6, f/8.0, f/16, etc.
Large aperture = smaller numbers: f/1.8, f/2.8, f/4.0, etc.

Some Tips to Remember

  • Remember, when hand holding a camera your goal is to have a shutter speed of 1/60 of a second or faster. Otherwise, you risk getting a blurred image. You can change your aperture to a lower number to help achieve a faster shutter speed, or bump up your ISO to make your camera more sensitive to light. Both of these will help you attain a faster shutter speed. If you are zooming out remember to bump up your shutter speed. Try to match or exceed your focal length. If you are zoomed out in the 200mm range, a shutter speed of 1/60 will most likely be blurry. You want at least 1/200 of a second or faster.
  • Larger apertures means the opening to your sensor is large; while the numbers, themselves, will be low. F/1.8 is considered fast and this is a large hole into your camera. F/2.8 and f/4.0 are also still considered fast.
  • Smaller apertures are designated by larger numbers, f/5.6, f/11, f/16, etc. Remember, also, the smaller the aperture, the more in focus objects will be around your main subject. Also note, when shooting something like a flower close up, you will want a smaller aperture. Something around f/8 will work very well. This will give you greater detail and bring the whole flower into focus.
  • Do you like sun stars or sunbursts; those shots with the sun in them that look like a star? Then, try using an aperture of f/16 or f/22. Don’t look directly into the sun, of course. I have often photographed this type of image, using a tree to block the sun, while allowing the sun to just barely peek through. You can also achieve this effect by positioning the sun off to the left or to the right of the image.
sunburst photography
“Sunburst” captured by James Jordan
  • Keep your ISO at 100, if possible. Generally, bump it up only when you need the speed, i.e. a faster shutter speed or a smaller aperture.
  • Slow that shutter down and use a tripod to get silky smooth water flows. Try using settings around 1-3 seconds or slower.
  • Remember, the further the background is from your subject, the more blurred it will become. This works especially well with a zoom lens and an aperture setting at f/5.6 or lower. Pro photographers utilize this technique a lot during portrait shoots.

Common Settings on Cameras

AV = Aperture Priority. You set the aperture and the camera will set the shutter for you.
TV = Shutter Priority (Time Value). You set the shutter and the camera will set the aperture for you.
P = Program/Auto. The camera will set both the shutter and the aperture for you; warning you if your shutter speed falls below 160th of a second. You still control the ISOFilm speed.
Green Mode = Full Auto. The camera will set both the shutter, aperture, and ISO, as well as fire the flash, if necessary.

Lens Filters: What Are They and When Do We Need Them

Monday 25 August 2014

Many lens filters in today’s digital society have been made redundant. Most cameras and/or post-processing tools now include features for correcting white balance, for softening, and for various special effects. But there are still some effects that simply cannot be reproduced without the use of filters. Here we give you an overview of the most essential filters that every photographer should learn to use.
lens filter guide“love story” captured by b-bee 

Using Lens Filters

A small filter may be applied to the lens to provide reinforcing or fun effects. Filters had their hay day when people where still photographing with film. Digital imaging had at that time not come that far, and we used different filters to get the desired effect instead.
For that reason, many associate the use of filters with a clear image manipulation. However the most common filters do not provide such drastic results. They are used simply to reinforce the individual effects, such as light phenomena.

Here are Some of the Most Common Lens Filters

Polarizing Filter
A polarizing filter is probably the most known and used of all filters, and not without reason. This filter works much like putting a pair of sunglasses in front of the lens. It eliminates reflections, glass, shiny surfaces and water, and thus enables you to photograph what is behind a window or under the water, rather than a surface full of reflections. Polarizing filters also contribute to greater contrast and more saturated colors, and they can make the sky darker, which is especially useful when photographing landscapes.
polarizer filter“Dubai Skyline” captured by Bella 
Polarizing filters work, however, only when you photograph your subject from an angle, not straight on. That is, if you stand right in front of a window and shoot, the filter may not be able to remove the reflections in the glass. Therefore, make sure you’re always shooting from an angle. There are two types of polarizers: linear and circular. Linear is used with older manual cameras, while the circular is used for cameras with auto focus.
UV Filter
A UV filter improves color reproduction and eliminates blur caused by ultraviolet radiation. Ultraviolet light is invisible to the eye and highly prevalent when shooting in hazy weather, mountainous regions, coastal areas and areas with very clear air. UV filters are colorless and do not require any extension of exposure time. It is recommended that UV filters be permanently mounted on the lens as a protective filter.
When you attach this filter on top of the lens glass, it is the actual filter that is exposed to any dust and scratches. It is much cheaper to replace a filter if you scratch or damage it, than to replace the entire lens.
When using a UV-filter, it is important to remember that the glass of the filter should have at least as good quality as the glass of the lens. Otherwise, the picture quality will be deteriorated.
ND (Neutral Density) Filter
A neutral density filter, makes it possible to shoot with slower shutter speeds or large apertures, even in very bright situations. This is because the amount of light emitted through the lens is reduced. This is useful if you, for example, want to photograph a waterfall in daylight, but still want the smooth effect of water in motion. ND filters are available in different strengths, depending on how much light you want to block out.
oregon-coast-neutral-density-filter“Sunshine” captured by Luke Detwiler
Another option is a graduated ND filter. This filter goes from dark to clear, with either smooth or sharp transitions. This filter is used, for example, when the foreground and background require different exposure. An example is when you photograph something dark under a bright sky. With a graduated ND filter, you can correctly expose the dark portion of the image without the bright portion being overexposed.
They are also used to reduce the contrast of the image. At sunrise, you may need to dim the sunlight a bit to reveal details in other areas of the image. There are also graded alternatives with colors, which can be used for special effects. Orange or brownish versions can provide atmospheric skies in the pictures.

Apple Offers Free iPhone 5 Battery Replacement - See if Yours Is Eligible

Saturday 23 August 2014

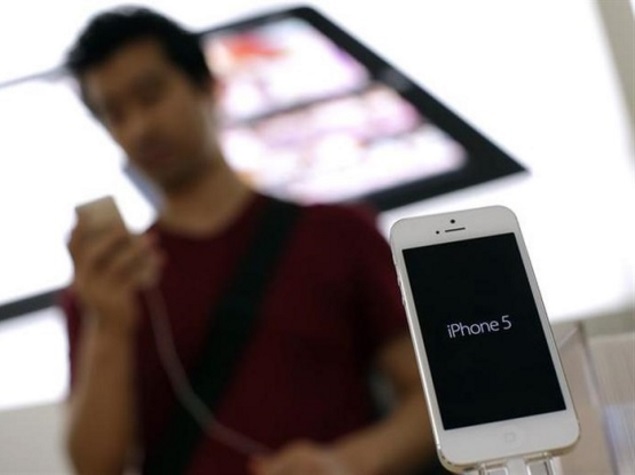
man_checking_out_iphone5_reuters.jpg


Apple is offering free battery replacement to select iPhone 5 owners under the iPhone 5 battery replacement program introduced on Friday.
Apple says it has determined that a "very small percentage" of iPhone 5 units may suddenly experience shorter battery life or need to be charged more frequently. The company adds that the affected iPhone 5 devices were sold between September 2012 and January 2013 and fall within a limited serial number range.
If your iPhone 5 "is experiencing these symptoms and meets the eligibility requirements", Apple says it will replace your iPhone 5's battery, free of charge.
The program opened to customers in US and China on Friday, August 22, and will be available in other countries from next Friday (August 29).
To see if your iPhone 5 is eligible, visit the iPhone 5 battery replacement program page on Apple's website and enter your serial number in the text box and click Submit. Apple will instantly tell you if you are eligible for a free battery replacement. If you don't know how to find the serial number of your iPhone,click here.
Even if you've bought your iPhone 5 outside the time window specified by Apple, it is worth entering your serial number to see if your unit is eligible as sometimes there can be a difference between the time Apple shipped the unit and when it was purchased by the end user, especially if its a resale or refurbished unit.
Apple has posted other information like where to bring in your iPhone for battery replacement if it is eligible, and instructions on how to backup your data before doing that. Check out the program page on Apple's website for the rest of the details.
Earlier this year, Apple had launched a sleep/ wake button replacement program for select iPhone 5 units.

What Is Affiliate Marketing FAQ For Newbies

img
Affiliate marketing is one of the best ways to make big money online .The limit of making money with affiliate is marketing is “Sky”.But affiliate marketing is not easy as you think, it takes time, you need trust and you need to learn how humans work ( Marketing icon razz Affiliate Marketing FAQ For Newbies ) So be patient and be passionate in promoting a product and yes, if you can promote it like mad then you’ll make money damn sure icon smile Affiliate Marketing FAQ For Newbies .I suggest you to recommend only high quality products to your readers and subscribers , because that helps in increasing conversions as well as trust.So let’s discuss some frequently asked questions about affiliate marketing.
1.What is Affiliate Marketing ?
You select an affiliate program, you join them , you promote their product/service, you generate sales or leads and you get paid.That’s affiliate marketing
2.How much I can earn from Affiliate Marketing?
Sky is the limit.
3.Is there any charges to Join Affiliate Programs?
Majority of the affiliate programs are free to use.
4.Can I join any affiliate program on the web?
Yes, you can but for some affiliate programs you can only apply, if the affiliate manager is approving your account then you can use them too.
5.How will I promote their products?
You can use your blogs, email list, facebook and other social media’s etc (Depends on the affiliate terms and conditions of that company)
6.How much Can I earn per sale?
Depends on the product and the affiliate program you choose, it may start from $0.001 to $1000 per sale.
7.Which is the Best Affiliate programs for Indians?
The most used affiliate programs are hostgator , bluehost , wpengine, flipkart etc.
8. What is the minimum payout and how can I grab the money?
The minimum payout depends up on the affiliate program ($0.001 to $1000) and you can use your PayPal for payment, still it depends on the program.
9.What are Affiliate Networks?
There are some affiliate networks like Shareasale , Commission Junction etc, where you can join a lot of affiliate programs and manage them in a single platform.
10.What is Pay Per Lead ?
Some affiliate programs pay for every single lead you generate.
11.What are Conversion Rates?
Conversions rates are calculated by this equation : Total Number of sales/Total Number of Click x 100
12.Is Adsense an affiliate program?
Adsense is an ad network, not an affiliate program.
13.What are w8 and w9 Forms?
W8 and W9 are tax forms for US and Non US citizens.You need to fill that In order to get paid from some affiliate programs.
14.How can I find affiliate programs?
Google for related keywords on your niche and search for their services and products, finally find its affiliate programs.
15.Is Affiliate Marketing Easy?
It’s easy if you have good influence and mailing list, else if you’re blank then you need to build up some influence and traffic to generate some sales, you may also try search engine marketing to generate mass sales.

HTC One M8 Review

Wednesday 16 July 2014

What Is HTC One M8?


The HTC One M8 is a key product for HTC this year. It is the phone that can change the company’s flagging business and indeed it already has. Recent reports suggest the Taiwanese company made a profit for the first time in a while. 

The HTC One M8 is the flagship model, and takes over from the HTC One, which proved to be HTC’s best-selling phone ever and won numerous plaudits including TrustedReviews Phone of the Year. The One M8 has some extremely big boots to fill.

It's no coincidence that the HTC One M8 has become such a quick success. It is sure to be remembered as one of the best phones of the year, and is clearly superior to its key rival, the Samsung Galaxy S5, in some respects. But not all.


HTC One M8 - Design


The HTC One M8 is a beautiful phone, especially when you compare to the Samsung Galaxy S5, or even the pretty LG G3. HTC has decided that the look and quality of materials matter, and has made them it's top design priority.

Like the original HTC One (which is still available to buy), the HTC One M8 is a metal phone. But there is a lot more sleek metal on show this time. To use HTC's own explanation, last year's model has a back that's about 70 per cent metal,  the HTC One M8's rear is around 90 per cent metal. 

The two-tone plastic have been replaced by a one-piece metal back that curves around to meet the Gorilla Glass of the screen's top layer. A new curvier design gives the HTC One M8 a smoother feel than its predecessor, while keeping the cool and hard feel your get with metal – aluminium in this case. 


It is a bit bigger than last year's phone, though. The HTC One M8 is a fair amount taller which means it feels like a larger phone in-hand. However, it's just a couple of millimeters wider and width is the only serious practical concern with a phone of this class. HTC has slimmed down the screen bezel to minimise the increase in width. 

If you're not used to a 4.7-inch to 5-inch screen phone, try to check out the phone first-hand. But if you're looking at this phone in contention with the Galaxy S5 and Xperia Z2, size is not an issue. And neither is weight, despite the phone being a little heavier than its rival.

In larger phones like this you often see the power button shifted to the side, from the usual spot up top. Here it sticks on the top edge, but the new Motion Launch feature lets you switch the phone on from standby with just two quick taps on the screen. This means that stretching for the power button is less of an issue.

Alternatively, you can go straight to the main home screen or the BlinkFeed window by flicking from the left or right of the screen (when it's off). This uses a special motion sensor chip in the phone, which lets it constantly monitor these sensors without eating up much battery.

  
In exact measurements the HTC One M8 is 9.4mm thick, 160g, 71mm wide and 146mm tall. None of these are notable in a positive sense, but HTC's non spec-centric design approach is healthy. It has tried to make a phone that looks and feels good, not one out to become the "thinnest" or "lightest". It can easily be argued that it is the prettiest, though.

One technical issue with making any 'all-metal' mobile device is that wireless antennas struggle to transmit through it. That's why the backplate is 'only' 90 per cent metal. There are two little plastic strips that sit across the top and bottom, and this is where the antennas live. These strips were used in the HTC One too, and have become part of the series's design language. Clever design like this makes functional choices look like pure style ones. 


Is this a better looking, better designed phone than the HTC One, though? Not really. You can't beat the borderless front of the original, which helped to emphasise that mobile's two-tone style. However, it's not any worse – the HTC One M8 is a lot nicer to look at than the HTC One Max, for example, and the vast majority of phones made. Ever.

It comes in three colours. The lead one, "gunmetal grey" is seen here. HTC also makes one that looks more like the first silvery HTC One, with a shade called "arctic silver", and a light gold one dubbed "amber gold". The latter is nowhere near as bright and vivid as the gold version of the Galaxy S5. 

They have slightly different metal treatments. The grey model uses a brushed 'hairline technique' look, while the others stick with anodised style of the former HTC One model.


The One M8 also solves one of the key perceived issues with the first HTC One – it has a microSD memory card slot. It sits on the right edge of the phone, using a pop-out tray. This ensures that the 16GB version of the phone will be the main one sold in the UK, as buying a memory card will always be cheaper than upgrading to a pricier version. HTC is going to make a 32GB edition too, but it won't be available everywhere here. 

HTC's move from a micro SIM to a nano SIM is more controversial. Just a few phones use this tiny SIM – most notably the iPhone 5S/5 and Motorola Moto X – and as the tray clearly makes room for a dual-SIM model, a size constraint clearly wasn't the main issue. Still, most networks will happily send you out a nano SIM replacement for free. You can also clip down your current SIM manually. But we don't recommend it.

The most obvious feature that you miss out on as a result of the phone's focus on looks is water resistance. The Samsung Galaxy S5 and Sony Xperia Z2 are both certified for water and dust resistance, using a slightly annoying rubbery flap to cover the microUSB charge socket. HTC's One M8 is not waterproof – its microUSB slot is exposed. Reports online suggest the phone is actually fairly water-resistant, but the lack of any rating means you won't be covered for any water damage. 

HTC One M8 SIM

HTC One M8 – BoomSound Speakers

The design isn't all about looks. The other hardware stand-outs include a dual-lens camera system and stereo BoomSound speakers on the front of the HTC One M8. These speakers are what make the phone so tall – but provide far better audio than the usual naff little mono speakers on the back of phones.

Your initial assumption might be that it's all about volume, but what the BoomSound speakers really provide that's worth having is greater authority, a much richer tone and more power. To say the HTC One M8 has real bass would be overstating it, but it does have the mid-range body that you don't get elsewhere. Extra power like this is as good as (if not better than) extra volume when the phone is competing with your oven's extractor fan as you listen to the radio while making a bolognese (insert your own situational anecdote here). 

This is one area HTC has substantially improved-upon since the HTC One. The sound is fuller, and a bit louder. HTC told us it has redesigned the tiny little piezo drivers (they may be BoomSound but they're still small) and the speaker enclosures, but it's likely to be down as much to a reworking of the DSP managing the treble-mid-bass output. 

Back when the HTC One came out, HTC was still working with Beats audio for its DSP, but now it's all HTC-branded. It's no great loss as HTC says it made most of the software anyway. It wouldn't be the first time Beats has been accused of being all about the brand...

The one weakness of the BoomSound speakers shows its hand when you're playing games. As your thumbs move directly over the drivers, your digits' movements do slightly alter the tonality of the sound. It's not something everyone will notice and doesn't affect movie watching in the same way. There is no rear case rattling caused by listening at top volume, though, which would have been much more irritating.

Narendra Modi Promises 'Glorious Future' on Relaunched PMO India Website

Tuesday 27 May 2014

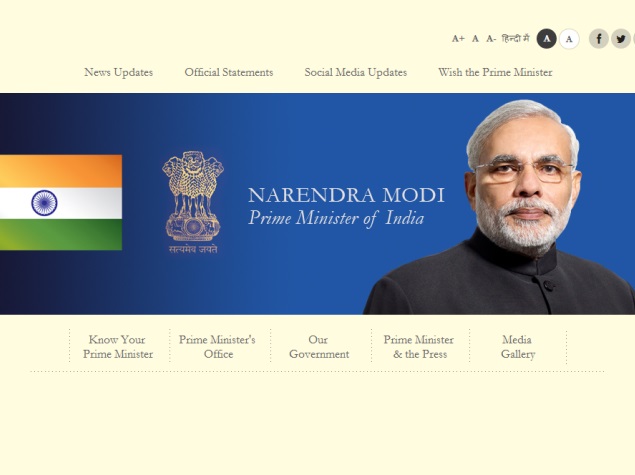
pmo_website_screenshot_01.jpg


Seconds after Narendra Modi was sworn-in as the 15th Prime Minister of the country on Monday, the PMO India website was relaunched carrying his message and pictures.
"As we devote ourselves to take India's development journey to newer heights, we seek your support, blessings and active participation," Modi said in his first message on the website.

He added, "Together we will script a glorious future for India. Let us together dream of a strong, developed and inclusive India that actively engages with the global community to strengthen the cause of world peace and development."

A short profile was also uploaded on www.pmindia.nic.in which described him as "dynamic, dedicated and determined" leader who "arrives as a ray of hope in the lives of a billion Indians".

It said that his "laser focus on development and his proven ability" to deliver results have made him one of India's most popular leaders.
Without naming the RSS, it said that from a very young age, Modi immersed himself in service to the nation, working with "patriotic organisations".
An option called "Wish the Prime Minister" takes a user to Modi's personal website.

How to Increase Search Traffic by 200%

Sunday 25 May 2014

Search Engine traffic is something we all expect and we all try to hard to get it for our blog right? But getting some good search engine traffic is not that easy.I started this blog 3 Months back and started applying all mySEO Techniques to boost my search Engine traffic.Getting huge search engine traffic on the first ever month is not that possible.But I worked hard to make it better.So I decided to boost my SEO traffic using some of My SEO methods and finally I inreased my search Traffic by 200%. Here are some screenshots icon smile How I Increased My Search Traffic by 267% .
3 How I Increased My Search Traffic by 267%
Search Traffic Improvement by 200%
2 How I Increased My Search Traffic by 267%
Analytics Traffic Improvement 
1 How I Increased My Search Traffic by 267%
Impression Increase in Webmasters
So here I’ll be sharing some of the best methods I’ve applied to get some Good organic traffic.Here I’ve used some tools to bring up my traffic (Not Robots icon razz How I Increased My Search Traffic by 267% ) I mean some tools to analyse and diagnose my problems and make it perfect is one of the important reason for my traffic increment.Oops! I’m lagging let me break some secrets :).
Monitor Backlinks Tool 
You may now think that I’m writing this post to get some affiliate sales out of it right? But to be frank Monitor Backlinks tool is so awsome and its the best reason behind my traffic increment.Okay you can do one thing go to monitorbacklinks directly without using my affiliate link and make the purchase because I don’t care if you are not using my affiliate link.I’m suggesting this because its really really helpful.I’ve no words to explain this amazing tool.So coming to the topic, How I increased my Traffic with Monitor Backlinks! Actually I was not into link building for my blog since some months and to be frank I’ve not written a single guest post for backlinks to my blog.But on the first month of My blog I was building some backlinks through Dofollow Comment Luv and the worst thing I can say is they are BullShits! nothing else , all the backlinks I created with Dofollow Luv comments are Nofollow icon sad How I Increased My Search Traffic by 267% . Actually the tool monitor backlinks helped me to find that fact ,but now I’m not ready to start with dofollow luv comment because its such a waste of time the reason behind it is that the site owners is changing it to Nofollow icon sad How I Increased My Search Traffic by 267% .The next best thing from Monitor Backlinks is that they’ll show the fluctuations in keyword position according to the growth of our backlinks.So after spending some time of analyzing my Monitor Backlinks dashboard I came to know that I should build more quality backlinks to get some good ranks.So I used the barter system written by me in one of my old post of link building.Actually I made some good and quality links using this barter system.I started offering free services to my clients and ask backlinks instead of that at the Home Page.You know that importance of getting a backlink at the home page right!.So  i builded around 10-15 Backlinks (Natural and Pure) to get a rank boost.To be frank the Link Juice was so tasty and I got some unexpected ranks out of it. icon smile How I Increased My Search Traffic by 267% All I did using the tool Monitor Backlinks.If you can’t pay for the monitor backlins tool try to grab your friends and buy an account and share it :).
Google Adwords Tool
The first word that comes to your mind while thinking of Keyword Research is Google Adwords and It has helped me a lot.To get some good organic traffic you should find a high Potential Keyword.For a High potential keyword you should try the Google adwords tool.If you are having any paid tools for keyword research then go for it.Monitor backlinks tool is not having any Keyword Research Option.So I’ve written some keyword optimized articles to boost my search traffic and I found the keyword using Google Adwords Keyword Planner.
Onsite and Onpage SEO
You should give more care on this rather than Backlinks.It doesnt mind if you have quality backlinks but all you really need is a good Onpage and Onsite SEO.Your Home page and even all your post must be perfectly optimized.The worst thing is that we are lazy to optimize the page.Don’t be lazy because if you work on it you’ll get atleast 1 visit a day from search, start from scratch :).So never ever compromise your Onsite and Onpage SEO.
Google Webmasters Tool
Analyzing the Search Queries and Impression in Google webmasters tool helped me a lot in increasing my search Traffic.Always keep an eye on Search Queries because some is seeing your site on Search Engines with that search querie (keyword) you may not getting some visits for it, but if you work more on that keyword then I’m damn sure your search traffic will boost like a Boss! :).
Google Analytics Tool
Always analyze your blog with Google analytics tool to know whats happening on your blog.In Traffic section you can see a option like Organic Traffic.You can know how much visits are you getting for Search Engines.Analyze that and make improvement to boost your search Traffic.
So , that’s how I Increased my Search Traffic by 200% and now its time for a boom boom on your blog too.Try these tips and you’ll see some cool changes in your Blog’s Search Traffic and I’m damn Sure about it.If you feel any doubts please let me know and share your thoughts with me.Have a Great and Keep visiting icon smile How I Increased My Search Traffic by 267%

Superstar Rajnikant is now on twitter

Sunday 11 May 2014

SuperStar Rajinikanth on Twitter - Follow him now

Tamil Film SuperStar Rajinikanth Joins Twitter just 5 hours ago. Within 5 hours more than 120k followers he got. His followers includes BJP Prime Ministerial Candidate Mr. +Narendra Modi . Below is the Official Twitter Page of Our SuperStar Rajinikanth and it is verified by Twitter within few hours. That's really great.

Official Twitter Page of Superstar Rajinikanth

In-fact this is the right time for our one and only SuperStar of Indian Cinema Rajinikanth to start his Twitter Page. Because his upcoming much expected movie Kochadaiiyaan to be released on this Friday 9th May 2014. So this is the perfect time to launch his Twitter Page. Millions of his fans really waiting this wonderful moment.

First Tweet by SuperStar Rajinikanth on Twitter

Follow him on his Official Twitter Page. Click the link SuperStar Rajinikanth Official Twitter Page

If you like this post then consider sharing with your social media friends and if you're true fan of our SuperStar Rajinikanth then give Like and +1's on both Facebook and Google+. Thank you

Amazing Spider-Man 2: A tangled web

Saturday 3 May 2014

spider_man_car.jpg


When the Amazing Spider-Man released in 2012, rebooting the series just five years after Sam Raimi's Spider-Man 3, there was a lot of doubt about whether the move made sense so quickly. Of course, with Disney having built up a steady stream of superhero movies coming out every year, it was natural for Sony to try and bring Spider-Man back in the theatres as well. The movie - made by the rather aptly-named director Marc Webb - paid off enough to warrant a sequel less than two years later.
Unfortunately, caught up in the new trend of Universe building (think Avengers, and the upcoming Batman vs Superman which is a launchpad for a Justice League movie) the Amazing Spider-Man 2 gets burdened with more weight than it can carry.
spider_man.jpg
On the plus side, as self-confessed Spider-Man fans across various movies, comics and cartoons, we can promise that Amazing Spider-Man 2 delivers a huge amount of fanservice - giving us some great action sequences and superheroes and supervillains that really come to life, making good use of the special effects budget.
Unfortunately, they're still not able to overcome one of the big problems of the previous movie, which is that the interactions between Gwen Stacy (played by Emma Stone) and Peter Parker (Andrew Garfield) just make both the characters look like annoying teenagers. Both actors do share a lot of chemistry on screen and are extremely likeable, but their characters are not.
spider_man_gwen_stacy.jpg
The movie treads on familiar tropes, and while it doesn't get as heavy handed as the "great power... great responsibility" speech of the previous incarnation of Spider-Man, the Amazing Spider-Man 2 shows us how Peter Parker's life as a teenager is wildly disrupted thanks to his secret identity as Spider-Man.
Early in the film, he's late for Gwen Stacy's commencement speech at their graduation because of a fight with a mobster (Paul Giamatti). He realises that the life he leads is a dangerous one, and breaks up with Gwen to keep her safe. Naturally, this doesn't last, and a lot of the teen drama feels needlessly shoehorned in, much like it did at the end of the first movie.
Gwen herself seems to be a locus for trouble - aside from knowing Peter Parker, she also worked with the Lizard in the first movie, and in this movie, her colleague Max Dillon (Jamie Foxx) turns into Electro, a supervillain whose powers are - you guessed it - themed around the manipulation of electricity. He looks a little bit like Arnold Schwarzenegger's Mr Freeze, which is fitting given how thematically-driven both characters are.
spider_man_harry_osborn.jpg
In case two supervillains weren't enough for you, the movie also introduces us to Harry Osborn (Dane DeHaan, who does look perfect for the part). Fans of the comics already know what that means, and we'll keep this spoiler free for everyone else, but suffice it to say that his big scene is pretty good. However, by the time the movie finishes introducing all the key players, you're already a little fatigued.
All the actors, particularly Garfield and Stone, give good performances, but they're working against tedious plotting. As a result, much like the first movie in the new series, you end up with some ridiculous deus ex machina setups that take you out of the narrative completely.
spider_man_electro.jpg
Jamie Foxx's Electro is where a lot of the camp in this movie comes from, and while you can see that the writers were trying to make him interesting and even somewhat sympathetic, he instead just comes across as over the top and cartoonish. Again, this isn't a sin per se, and a lot of people are going to enjoy watching Electro go on a rampage, but it seems to be at odds with the general look and tone of the movie.
On the other hand, it's a great movie to just watch. Without worrying about the plot or what the characters are talking about, if you just watch it for the giant battle in Times Square, or the fight between Spider-Man and Rhino then you're going to really enjoy things.
Watching Osborn turn into the Goblin, and just looking at the detailing on the Rhino suit Giamatti fights Spider-Man in is wonderful, while Stan Lee's usual cameo will make fans smile, as always. At the end of the day, the movie looks great even if it doesn't always make sense.
That's really what's at the core of our complaint with the movie. Despite amazing special effects and action sequences that make it clear that this is a very modern movie, the writing seems firmly grounded in an earlier era of storytelling.
spider_man_fight.jpg
If these new Spider-Man movies had released instead of the Tobey Maguire ones, there would be no complaints, whatsoever. Today though, we're used to movies like Christopher Nolan's Batman series, and Joss Whedon's take on the Avengers (which released in the same year as the Amazing Spider-Man). Recently, Captain America: The Winter Soldier showed us how you can take a camp character and convoluted plot, and turn it into something that's gripping.

If you're looking for a comic book romp with lots of amazing action, then the Amazing Spider-Man 2 delivers. We will certainly be watching the movie again. Over the last few years though, we've come to expect a little more from superhero movies, and this movie doesn't quite match some of the best work we've seen in the genre, staying firmly in the middle, just like the first part.
The Amazing Spider-Man 2 released in India Thursday, in 2D and 3D, and has a run-time of 142 minutes.
 

Popular

Translate